



The Bully Fragmenter is a powerful explosive in ARC Raiders that can deal heavy damage when its clusters hit a target. It is useful against large ARC enemies and opponents with limited room to move. To get the most from it, players need to consider the target’s position, the timing of the throw, and whether the item is worth spending on the encounter.
These decisions matter even more for solo players. Without teammates to provide cover, wasting an explosive can leave you with fewer options later in the raid. Knowing when to use the Bully Fragmenter and when to save it helps you manage supplies while working toward your objectives.
How the Bully Fragmenter Works in ARC Raiders
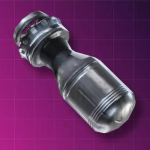
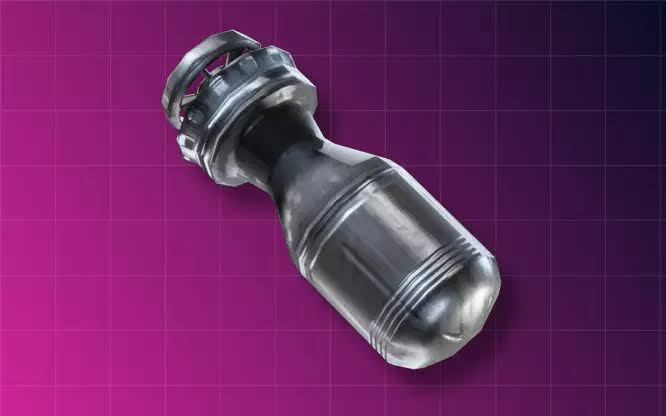
The Bully Fragmenter is an Epic throwable that splits into multiple explosive clusters. Its listed damage is 40 per cluster, with eight clusters and a 5-meter radius. Actual damage depends on how many clusters hit the target, so the maximum listed damage is not guaranteed.
| Detail | Information |
|---|---|
| Rarity | Epic |
| Damage | 40 per cluster |
| Number of clusters | 8 |
| Radius | 5 meters |
| Main sources | Bullies and ARC Couriers |
| Research Station Level 3 | Requires 6 Bully Fragmenters |
The Fragmenter also has progression uses. Players may need it for the Research Station Level 3 upgrade, the Bait, Fetch, Blast quest, and Anvil Blueprint research. Check your objectives before using one, especially if you are still collecting materials for an upgrade.
Since the Fragmenter deals damage through multiple clusters, a target’s movement can affect the result. Look for a clear throwing angle instead of using it as soon as an enemy appears.
Best Situations to Use the Bully Fragmenter
The Fragmenter is most useful when you have a clear opportunity to deal damage. Throwing it immediately after spotting an enemy can waste its potential if the target moves quickly or has plenty of open space.
Against Large ARC Enemies
Large enemies can provide a practical target for a cluster-based explosive, although the damage still depends on how many clusters connect.
- Check the enemy’s position before throwing.
- Keep enough room to move after the explosion.
- Follow up with your main weapon if the target survives and it is safe to attack.
In Confined Areas
Narrow passages and enclosed spaces can limit an enemy’s movement, potentially improving your chances of landing multiple clusters. However, these areas can also make retreating harder. Check your surroundings and keep an escape route open before throwing.
During Difficult Encounters
A Bully Fragmenter can be worth spending when a dangerous enemy is putting pressure on you. Before using it, consider your position, remaining supplies, and the value of the target.
If the fight is already going badly, moving to cover may be more important than forcing another attack. Save the Fragmenter for encounters where its potential damage justifies the cost.
When Several Threats Are Close Together
An explosion may be useful when multiple enemies are near one another. Check your surroundings before throwing, then switch back to your weapon when the explosion goes off. Do not assume one throw will end the encounter; be ready to reposition if enemies continue attacking.
Build a Practical Solo Loadout
A solo loadout should provide enough firepower without using every inventory slot for combat supplies. Your setup depends on your objectives, the map, and the equipment you are willing to risk.
| Loadout Item | Purpose |
|---|---|
| Primary weapon | Main source of damage |
| Secondary weapon | Backup for different combat situations |
| Bully Fragmenter | Burst damage against suitable targets |
| Healing supplies | Recover after taking damage |
| Ammunition | Prepare for unexpected encounters |
| Shield | Provide protection based on the shield equipped |
Choose weapons you can use reliably. You may need to fight an ARC enemy, respond to another Raider, or retreat without finishing the encounter. A familiar weapon and enough healing supplies are often more useful than carrying specialized equipment you rarely use.
Balance combat supplies with inventory space. Carrying too many consumables can leave less room for quest items and crafting materials, while bringing too few can make a long raid harder to finish.
Use Cover and Positioning to Stay Alive
Good positioning gives you room to aim, throw explosives, reload, and heal without giving enemies an easy shot. Before starting an encounter, look for solid cover and consider where you can move if the fight becomes difficult.
Keep these habits in mind:
- Find cover before committing: Avoid starting a fight in the open when a safer position is available.
- Keep an escape route open: Do not move somewhere that leaves you trapped after throwing.
- Watch your surroundings: Focus on the target without ignoring other threats.
- Choose a useful throwing angle: Make sure you can continue attacking or return to cover afterward.
A position should support the entire encounter, not just the throw. If you have a clear view of the enemy but no safe way to move afterward, find a better angle before attacking.
Combine Explosives With Accurate Gunfire
The Bully Fragmenter works best as part of a wider combat plan. It can deal burst damage, but you should not rely on the explosion alone to finish every target.
Use this sequence to manage the encounter:
- Identify the target. Check its position and movement.
- Choose a safe angle. Make sure you have cover or room to retreat.
- Throw at the right moment. Avoid using the item when the enemy can easily escape the blast.
- Follow up with gunfire. Continue attacking if the target remains exposed.
- Reassess the fight. Reload, heal, or reposition based on the enemy’s response.
If the explosion deals less damage than expected, do not rush into another throw. Adjust your position and use your weapon when you have a clear shot. This helps conserve explosives for more demanding encounters.
Manage Bully Fragmenters and Other Resources
Bully Fragmenters have both combat and progression value. If you are collecting the six required for Research Station Level 3, using one on a low-priority enemy can slow down your upgrade progress. The same applies to quest and blueprint requirements.
ARC Raiders Items are an important part of preparing for raids and completing progression goals. Before heading out, decide whether your run focuses on combat, material collection, or a specific quest. This helps you choose which supplies to bring and how much backpack space to leave available.
Players who want another way to prepare their inventory can also choose cheap ARC Raiders Items, depending on their preferences and progression goals.
During a raid, keep track of your supplies and available inventory space. Before starting another fight, consider whether you have enough ammunition and healing items to continue. If your backpack is nearly full, weigh the potential reward against the risk of losing what you have already collected.
Resource management is about knowing when an item can make a meaningful difference. Saving every Fragmenter can make difficult fights harder, while using them without a plan can delay your progression. Base your decision on your current supplies and objectives.
Making Better Use of the Bully Fragmenter
The Bully Fragmenter can deal substantial damage when its clusters connect, but timing and positioning affect the result. Use it against suitable targets, follow up with accurate gunfire, and save enough for important upgrades and quests.
You do not need an explosive in every fight. If your regular weapon can handle the target, keep the Fragmenter for a more demanding encounter. A practical loadout and careful use of supplies will help you stay prepared throughout your solo raids.